|
From this...
|
Having strengthened the rear suspension
on my Baja I also wanted to improve my front suspension too.
I started to take measurements and design some templates for
longer shock towers, but a friend told me that Kingfisher
Kustoms made a kit. They had one left so I bought it.
The kit is just a set of pre-cut steel plates, and some shock
bolt bosses, which you weld together.
|
...to this!
|
| |
|
|
|
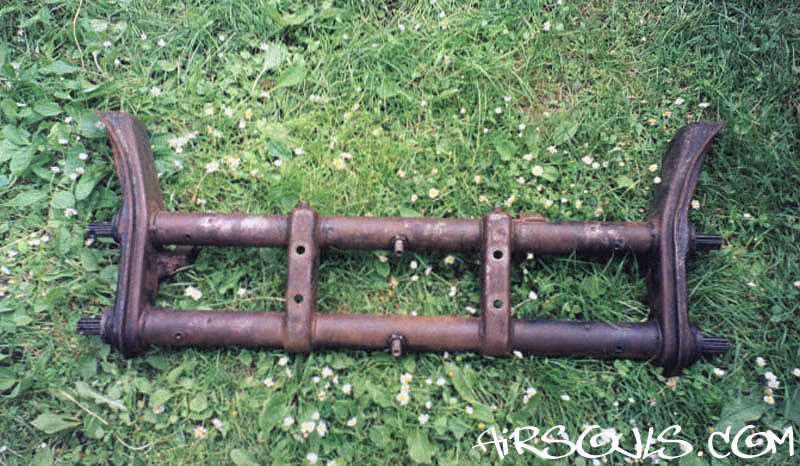
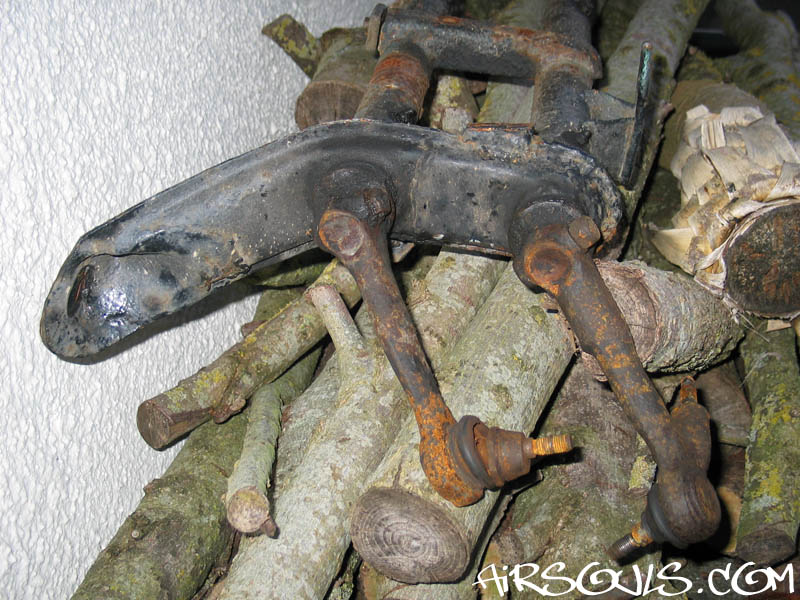
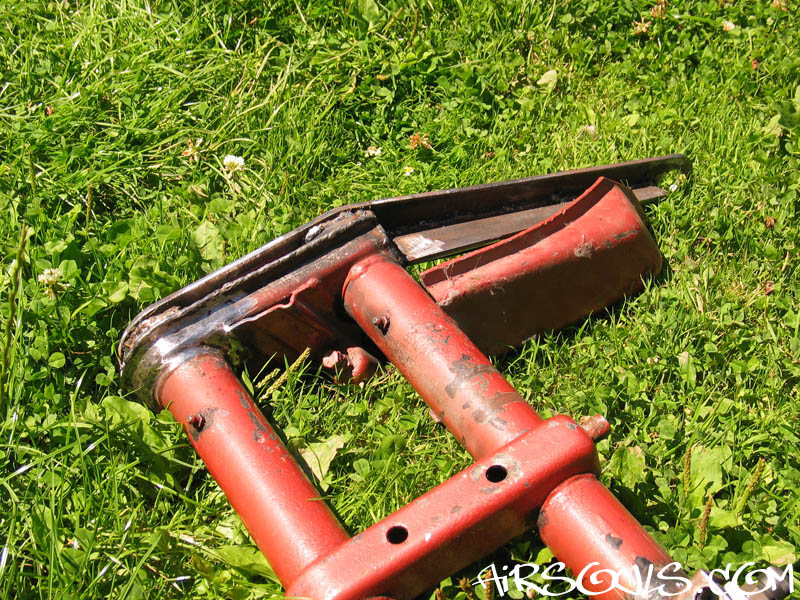
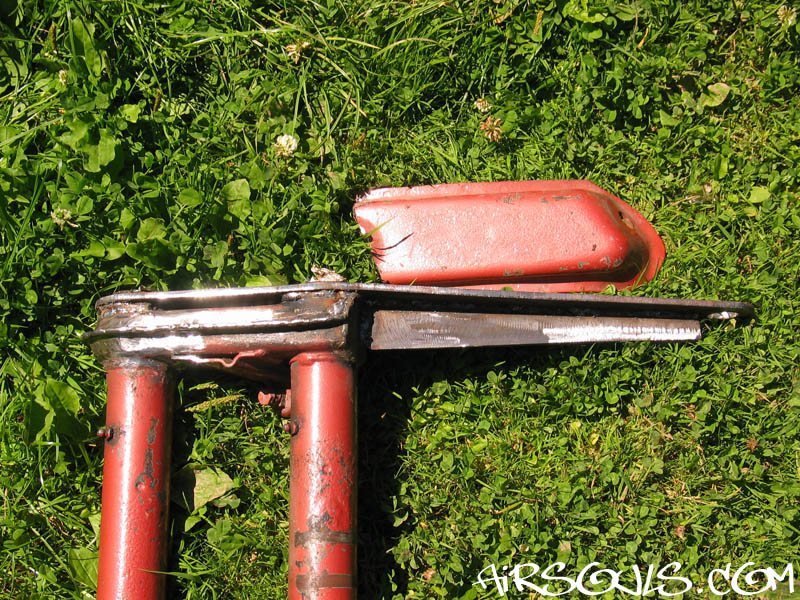
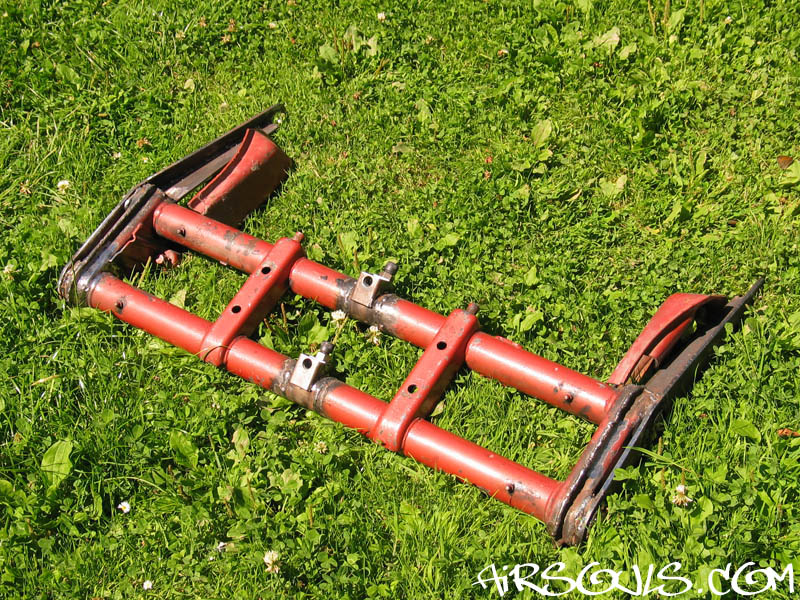
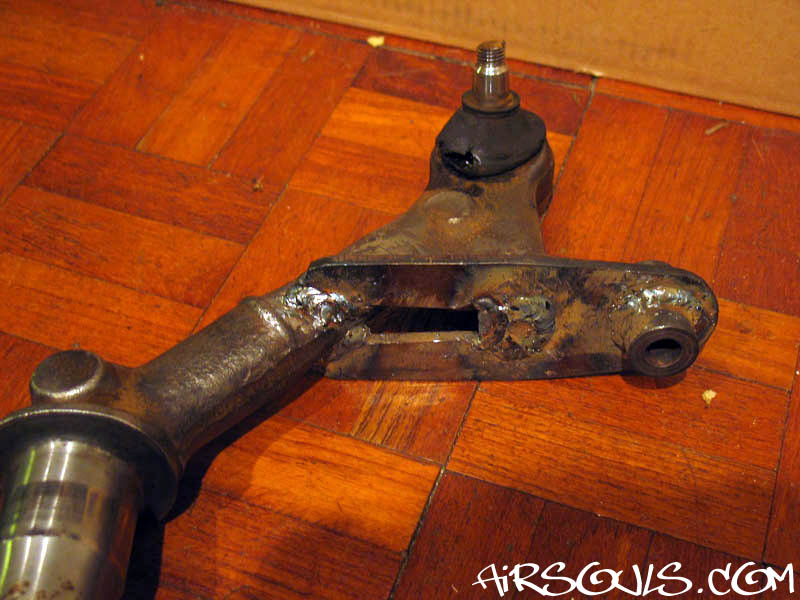
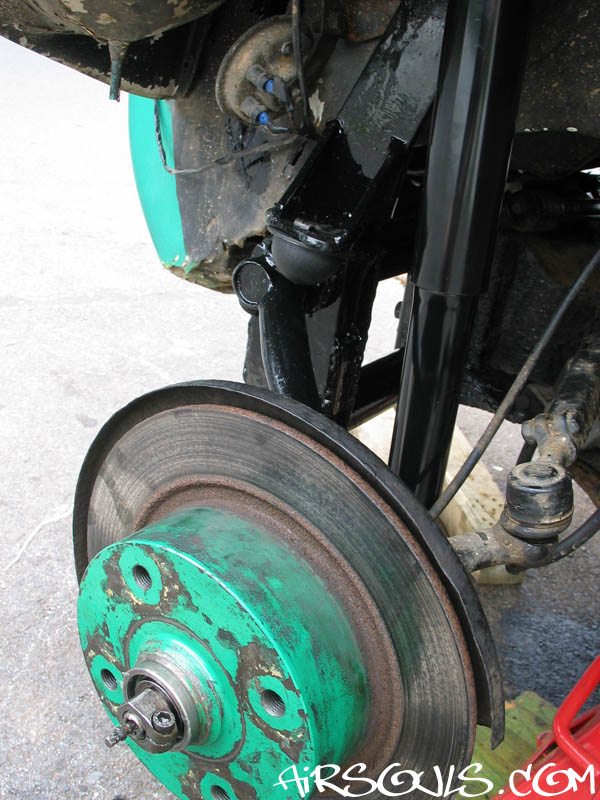
| 1. To start with you need
a good solid beam. This how-to is aimed at balljoint beams,
but you could do the same to a linkpin beam. The photo on
the far right is the beam I replaced - you can see where has
been repaired in the past. This wouldn't be as good a starting
point. |
|
| |
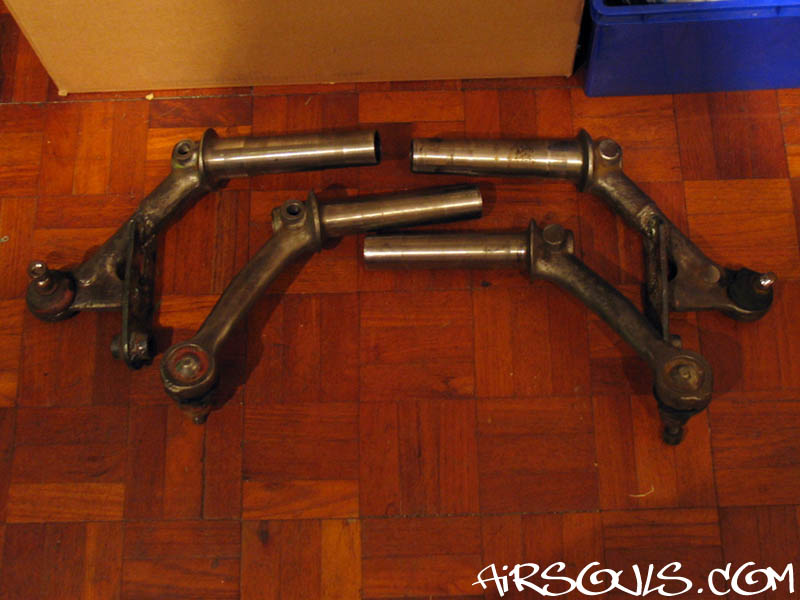
2. Because I was modifying the
beam I welded in some adjusters while I was at it. Cut out a
tube, and weld in a adjuster, one at a time. This way the beam
stays straight. Sway-a-way adjusters are quicker and easier
to fit, but use whichever one you prefer. |
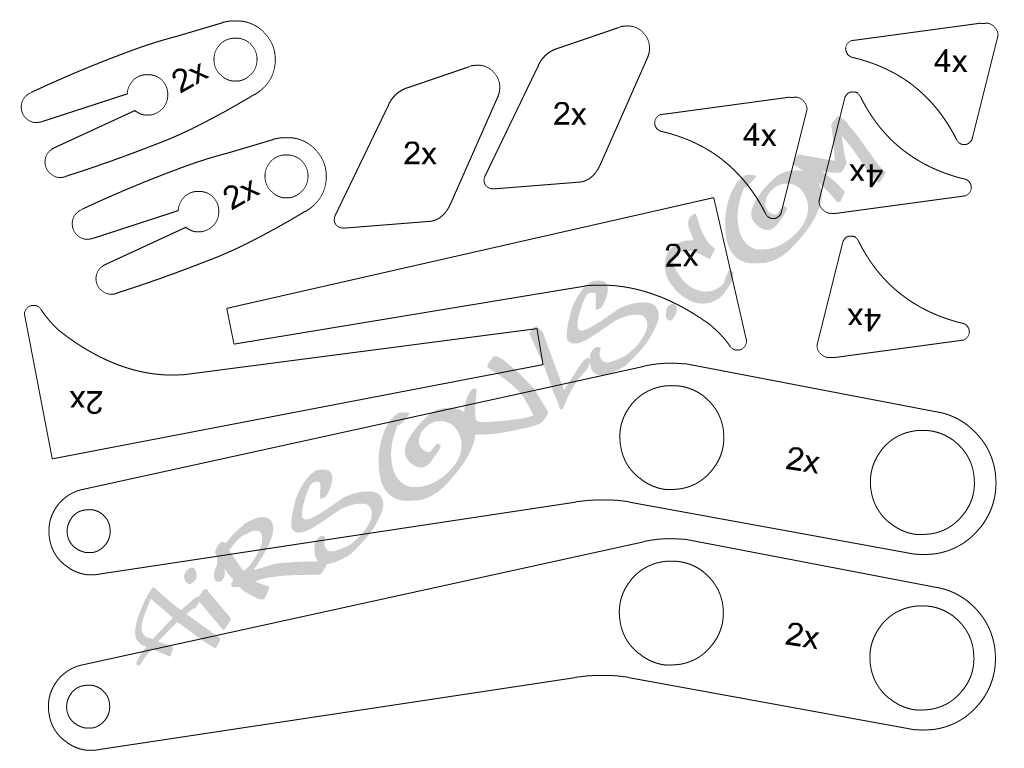
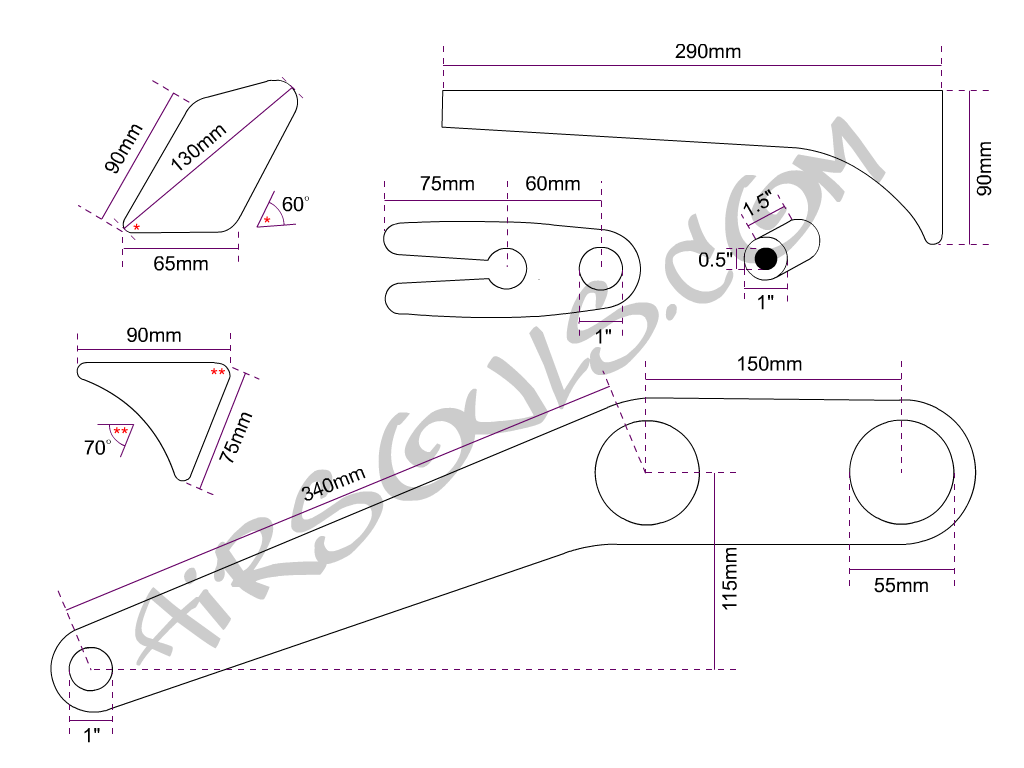
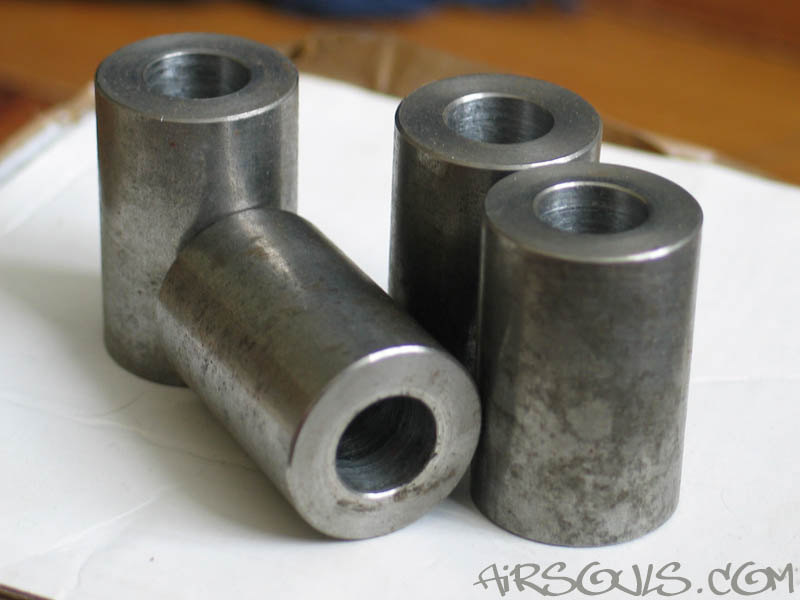
| 3. I forgot to
take photos of all the pieces you need so I made diagrams
of them instead. The first one shows all the pieces you need,
and the second one shows all the approximate dimensions you
would need to make your own set. (Click on each one to view
them full size.) |
|
|
4. The first job is to chop
off the existing shock towers. Cut them off level with the
top tube, and then weld a small plate over the hole.
Note: You could also chop off all traces
of the old towers, but make sure you weld in a temporary brace
between the tubes first to keep them aligned. |
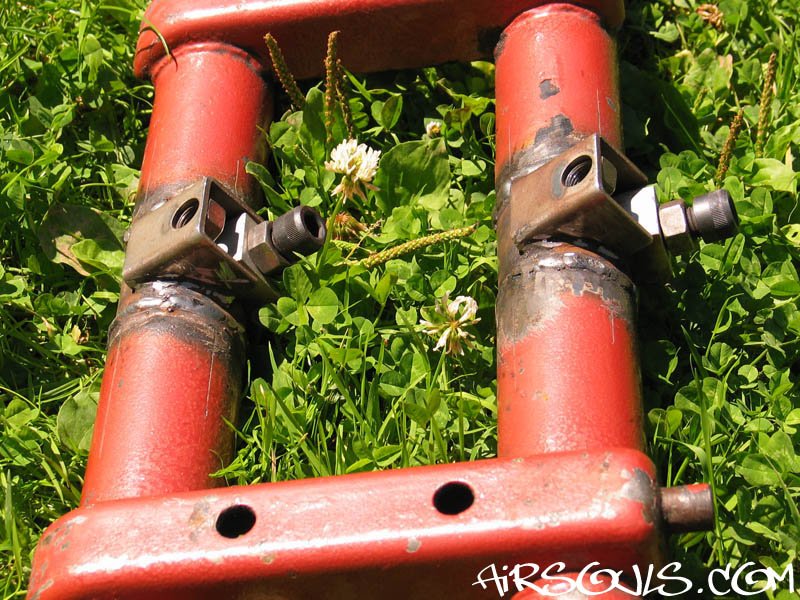
5. Now you can tack weld on
the new shock towers. Check that the towers are aligned correctly
with each other before you fully weld them on. I found that
a long straight rod sat between the shock mounts really helped
to ensure everything was correctly aligned. |
|
|
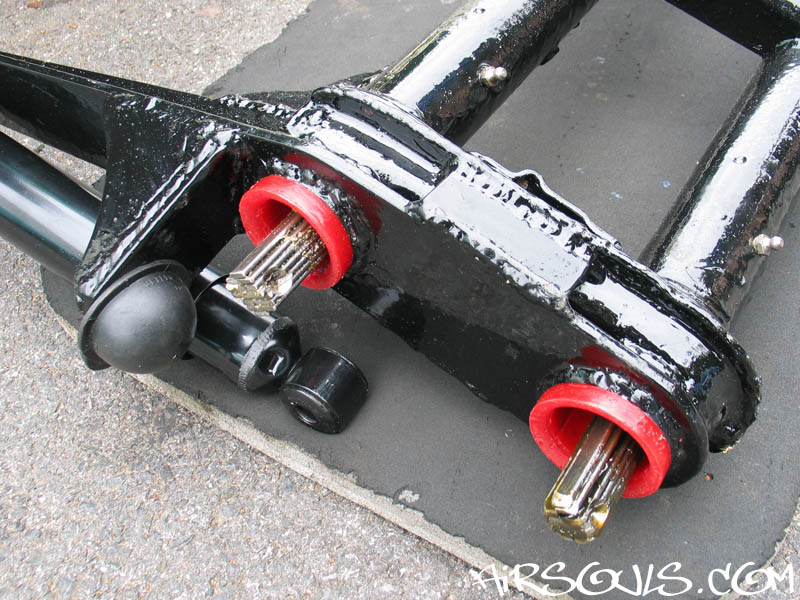
6. Welding so close to the roller
bearings will distort them and the bearing seat within the tube.
This isn't a problem though because you can remove the stock
bearings and replace them with urethane bushings. The urethane
bushings are more durable in off-road conditions, so it is worth
changing them anyway. Buy the full length bushings because they
support the whole length of the arm within the beam. |
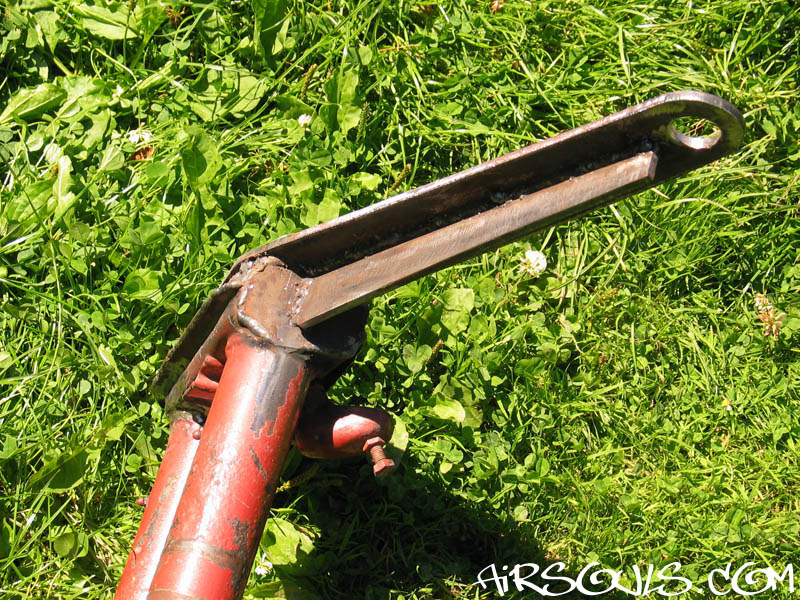
| 7. To match the longer
and stronger shock towers I welded on stronger lower shock mounts.
These allow you to fit a strong shock bolt, and also move the
shock backward a little. This gives you better clearance and
allows you to run a longer shock. |
|
|
8. Once the arms are at this
stage you can trial fit everything together including a pair
of spindles. This will help you to work out where to put the
upper bump stops.
This is also the time to weld on the upper shock mounts,
because you can ensure they line up with the bottom mounts. |
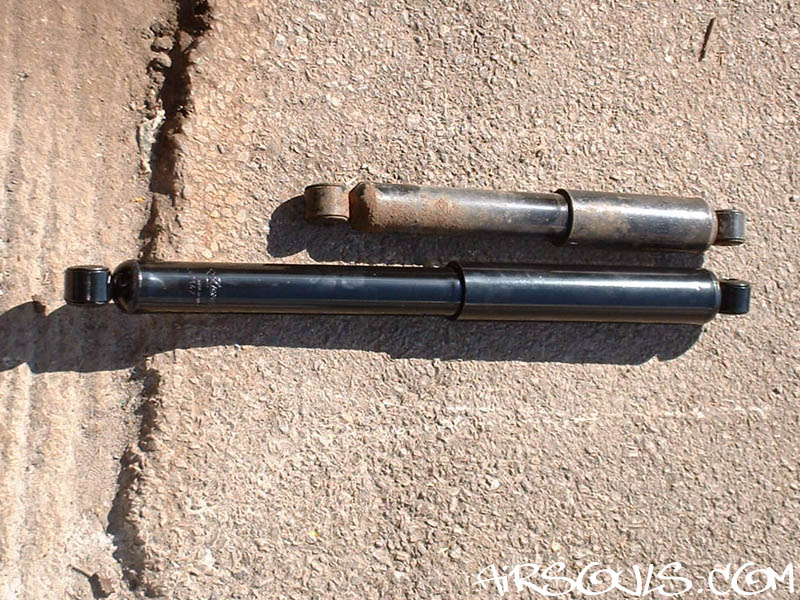
| 9. Here you can see the finished
tower, with the bump stop mount welded on. I run type 2 rear
shocks, which have 8" of travel. You can see one in the
photo next to the shorter type 1 rear shock. |
|
|
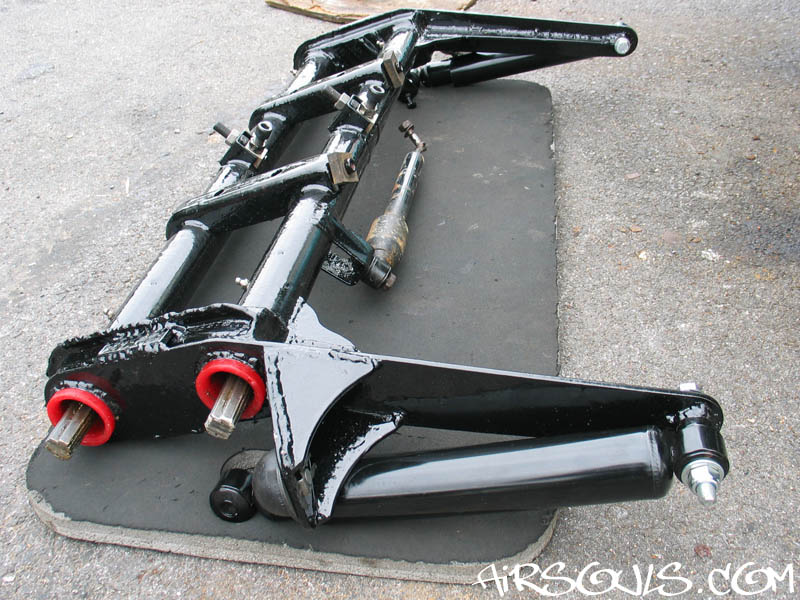
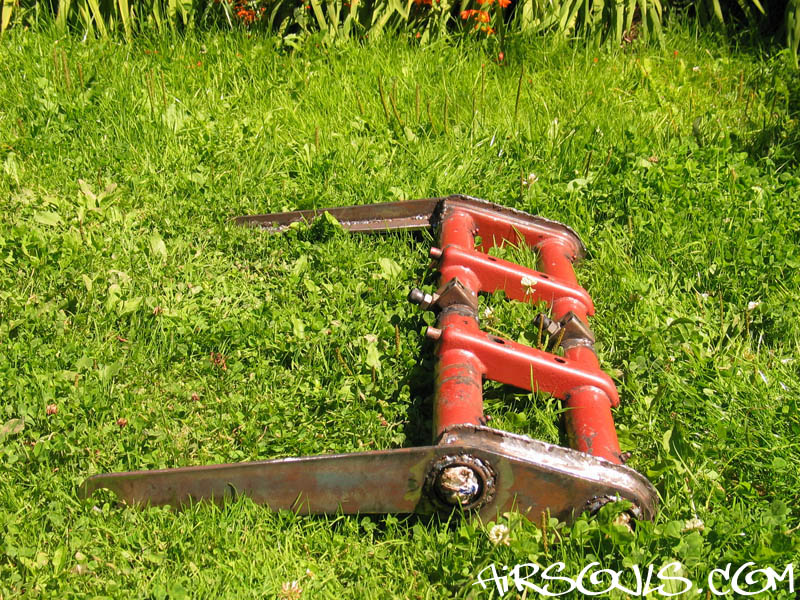
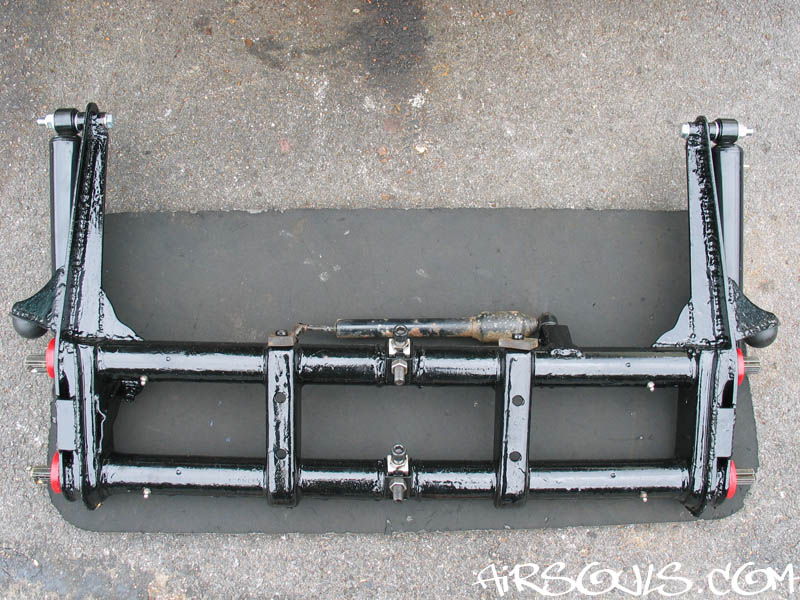
10. This is the finished beam
ready for fitting. The rubber domes are type 2 bump stops that
I found to be a good size. |
| 11. A couple more photos of the
beam looking cleaner than it ever will! You can clearly see
the urethane bushings and the rubber bump stops. |
|
|
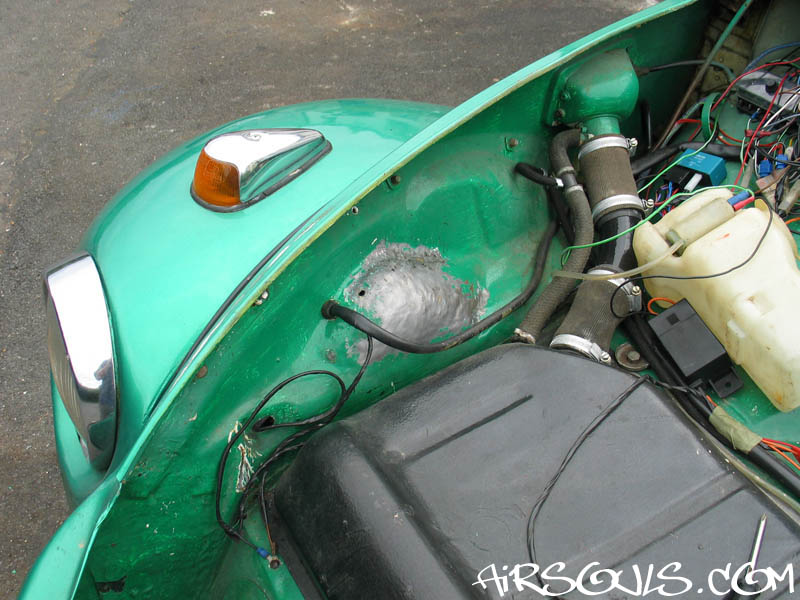
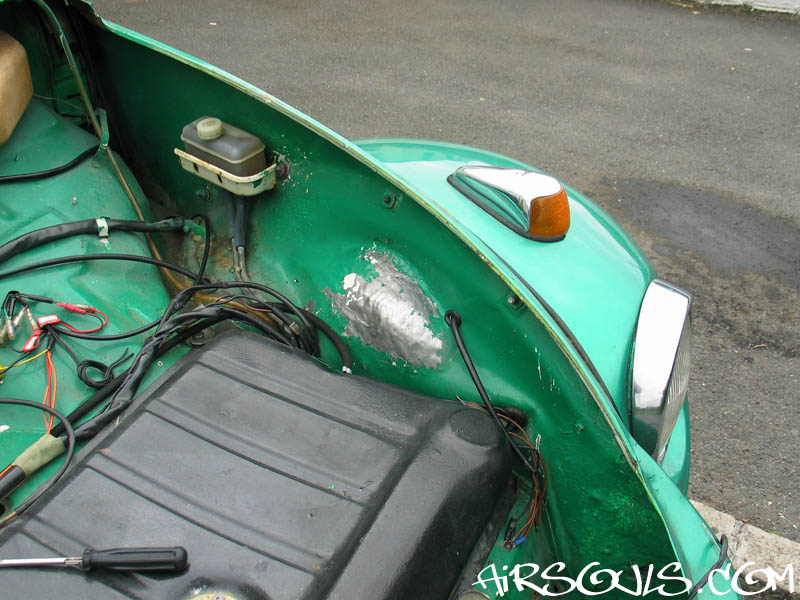
12. Because the shock towers
are so much taller I had to reshape my inner wings. Here are
the resulting bulges as seen from under the bonnet. They took
a little while, but were quite easy to do. |
| 13. The beam in place.
To hold the beam at firmly as possible I have also added upper
and lower beam supports. I may add photos of these at a later
date. |
|
| |
Click
an image to view a larger version. |
|
| I have had this beam on since
2003 and it is still going strong. When combined with the
2.5" raised disc spindles I made at a later date, and
my stiffer Sway-a-way torsion leaves, this is the ultimate
balljoint front end. But that hasn't stopped me planning the
next stage...
Any questions feel free to e-mail. :-)
Log:
Beam fitted: August 2003
Lower beam supports fitted: August 2004
Upper beam supports fitted: February 2006
Re-located the bump stops to give 15-25mm more travel: September 2007
|